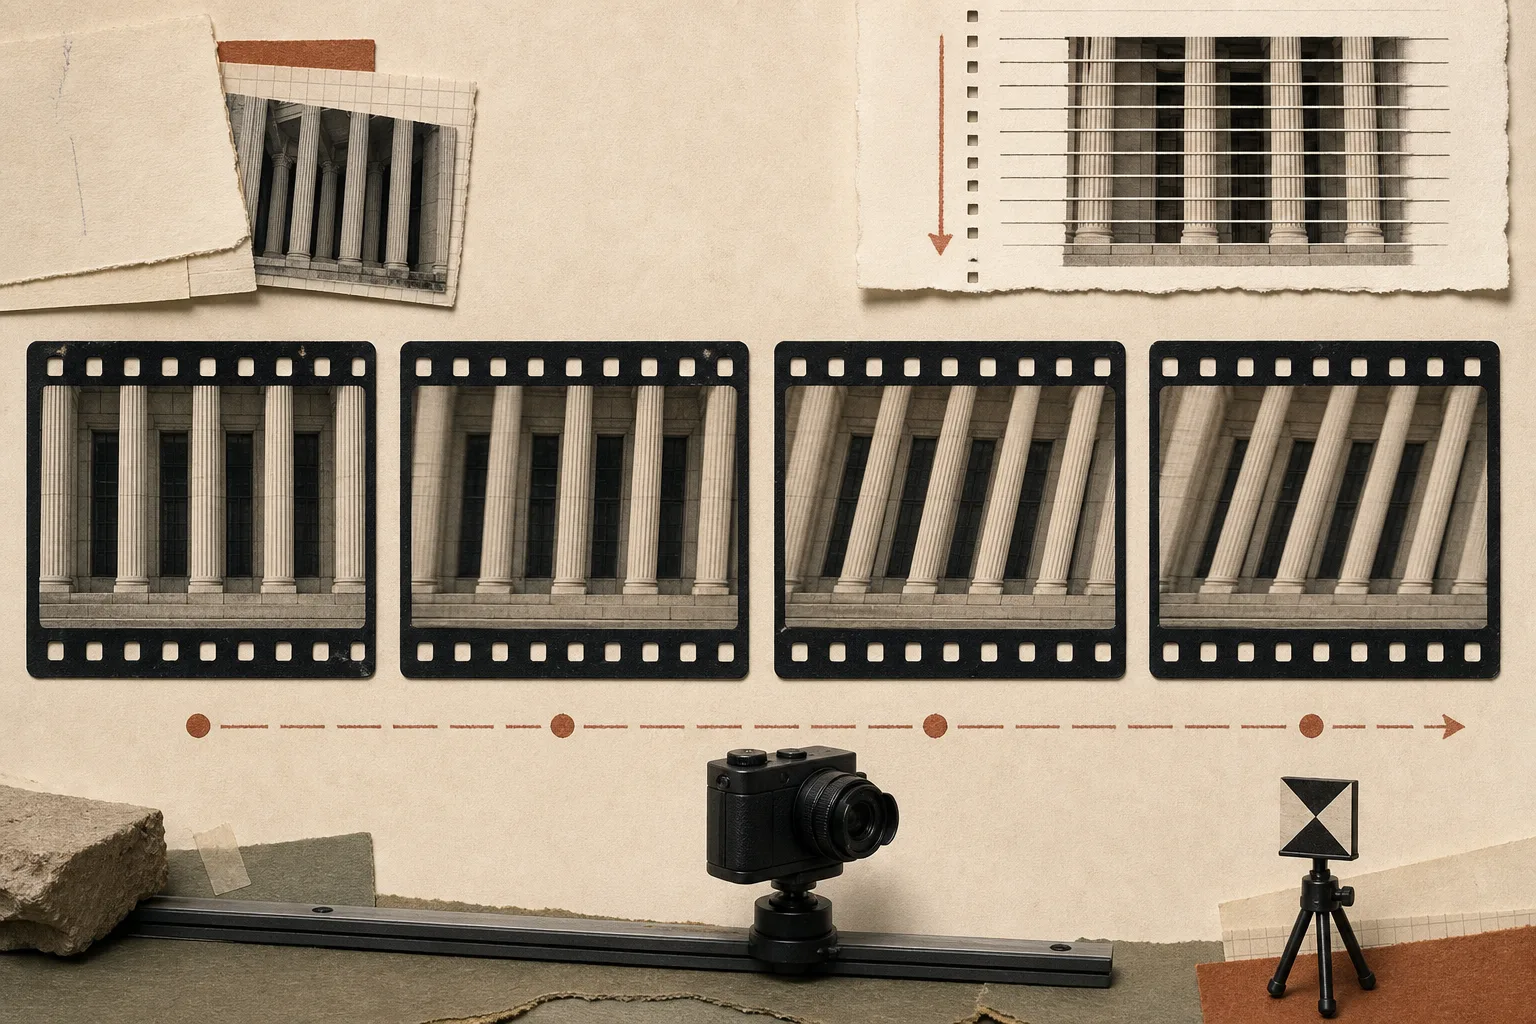
Many cameras read an image sensor line by line rather than capturing every line at exactly the same instant. If the camera or subject moves during that readout, different parts of one frame record different moments. The result can be leaning lines, stretched movement, or a flexible-looking image.
Rolling shutter is about time, not pixel count.
Resolution describes how many pixels are recorded. It does not state how long the sensor takes to read a frame. Two cameras can record the same resolution and frame rate while producing noticeably different distortion during movement.
A still frame from a motionless scene may look excellent because there is little change during the readout. The weakness appears when the camera pans, a vehicle crosses the frame, a person moves quickly, or vibration affects the body.
Test every recording mode that matters.
Sensor readout can change with resolution, frame rate, crop mode, oversampling, and other recording settings. A result from 1080p does not prove how 4K behaves, and a 4K 24 fps test does not automatically describe 4K 60 fps.
Use the exact resolution, frame rate, field of view, codec, and stabilization planned for the work. Keep the lens and camera position consistent when comparing modes so that the recording setting—not a different composition—explains the result.
Use straight lines and repeatable movement.
Place vertical lines such as door frames, posts, shelves, or building edges across the frame. Pan left and right at a slow, normal, and deliberately fast speed. Repeat each movement several times and label the clips immediately.
Then keep the camera still while a subject crosses the frame quickly. This separates distortion caused by camera movement from distortion caused by subject movement. The test should resemble the work: a gentle interview reframing and a handheld sports shot do not need the same tolerance.
Stabilization cannot repair sensor readout.
Optical, in-body, and digital stabilization can reduce some camera movement, but they do not make every line in a frame begin exposure at the same time. Strong digital correction may crop the image or introduce edge wobble while trying to smooth movement.
Test stabilization on and off with the intended lens. A tripod, monopod, gimbal, wider focal length, or slower camera movement may make the distortion less visible, but each changes the way the shot is made. Choose the smallest intervention that keeps the intended movement.
The acceptable amount depends on the shot.
Rolling shutter is not always visible and does not make every clip unusable. A locked shot of a slow subject may be unaffected in practice. Fast pans, handheld walking, long focal lengths, vehicles, sports, propellers, flashes, and rapid vibration expose it more readily.
Judge the motion at the intended playback speed and delivery size. Pausing on the most distorted frame can help diagnose the cause, but the final decision should also consider how the complete shot looks in normal playback.
Design the shot around the measured limit.
If the chosen mode shows unacceptable distortion, compare another recording mode or camera before trying to hide the problem in editing. When the camera must be used, slow the pan, shorten the focal length, stabilize the support, change the subject path, or choose a more static composition.
Keep a short reference test for each camera and common mode. Record the lens, focal length, stabilization, frame rate, resolution, and movement used. The note becomes a practical operating limit rather than a vague memory of whether the camera felt good.
When the problem is readout time, more pixels are not the answer.
The motion test
- Use the exact recording mode and lens planned for the shoot
- Frame several straight vertical lines
- Repeat slow, normal, and fast pans
- Record a fast subject while the camera remains still
- Compare stabilization on and off
- Review at the intended playback speed and delivery size