Stock Video Settings 1: Resolution and fps
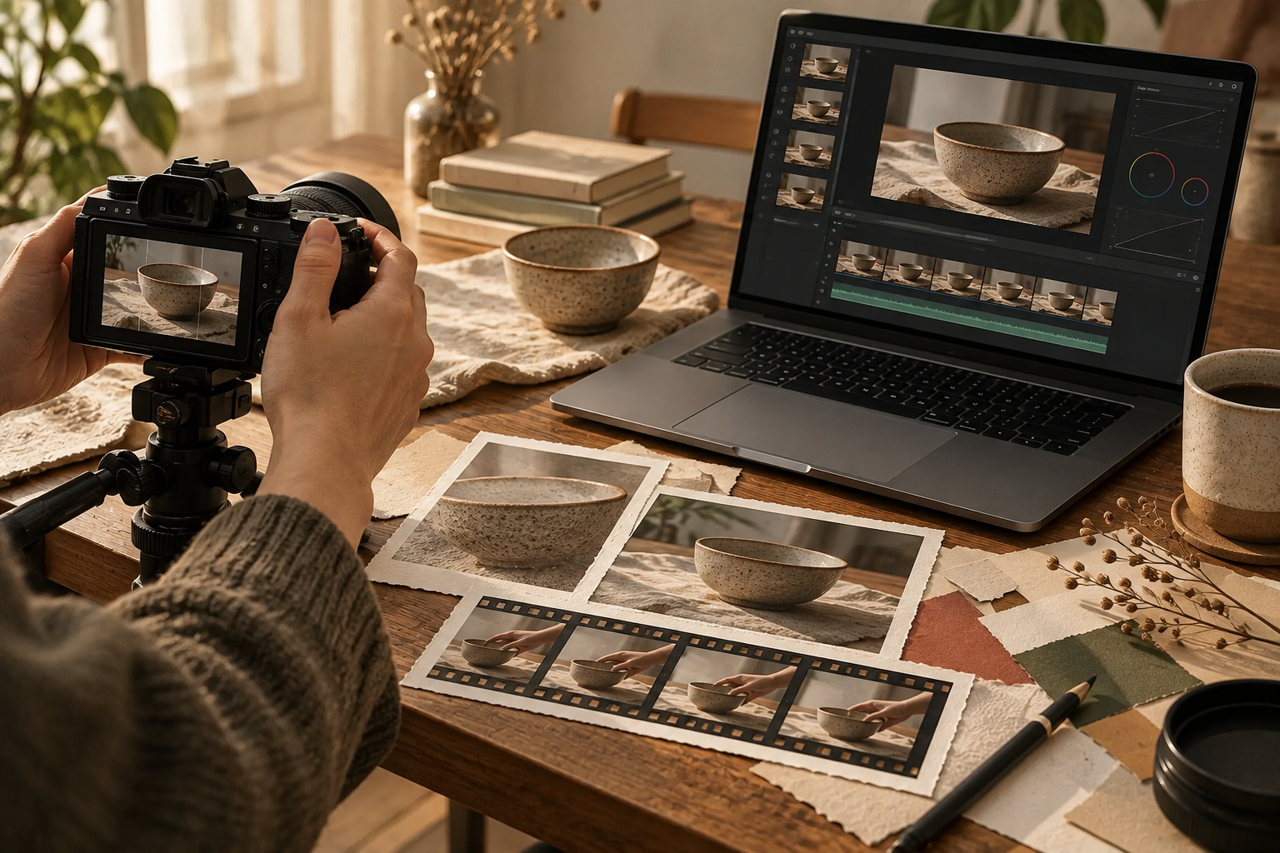
Video settings screens are full of numbers such as 4K, 30p, and 120fps. Start by considering resolution, which determines the detail in the picture, separately from frame rate, which determines the number of frames in 1 second. fps stands for frames per second: the number of frames in 1 second. A frame is 1 individual image, or 1 still picture, in a video.
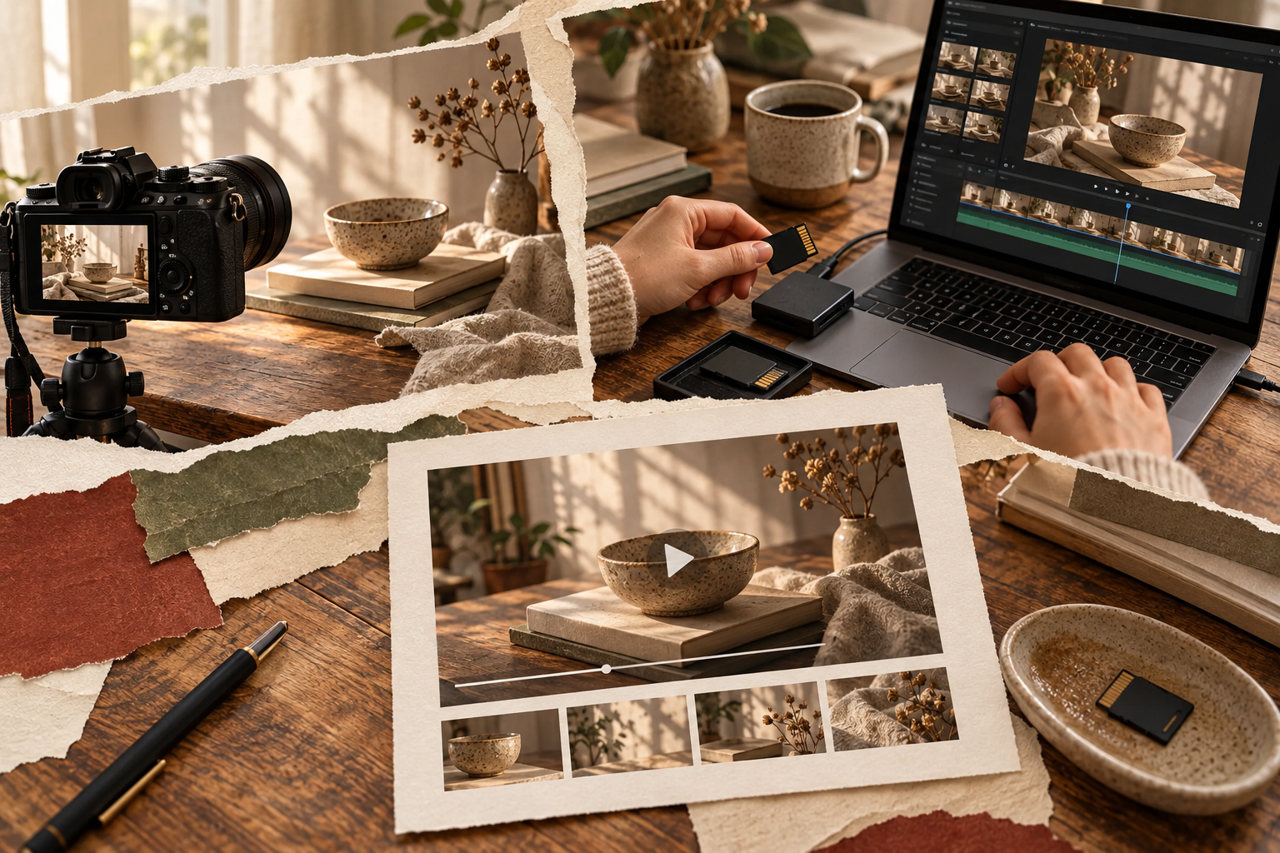
First, try the whole process from shooting in 4K to submission
Resolution is the number of tiny dots, called pixels, that make up a picture. 4K UHD is 3,840 pixels wide × 2,160 pixels high; Full HD, one of the HD formats, is 1,920 × 1,080 pixels. UHD is the name of this particular 4K standard; the term 4K also covers other dimensions.
If you can start in 4K, you have some room to crop the picture during editing. Higher resolution also increases the burden on storage and editing, though. Record a short clip with your own camera and try everything from importing it to exporting it on your computer. Exporting means turning your edited result into a video file for submission. HD is also an option. Choose settings you can handle all the way through, rather than starting with the highest settings.
Where to use the extra room in 8K

Full view: 8K UHD
7,680 × 4,320 pixels
Crop: 4K UHD
3,840 × 2,160 pixels
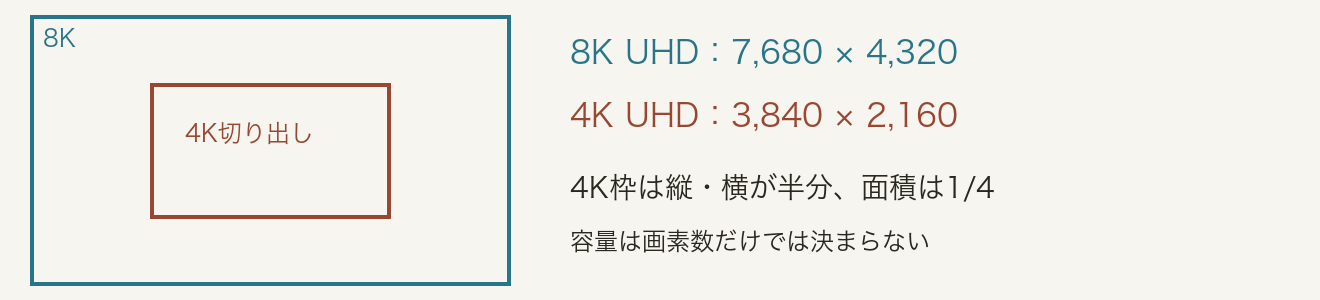
8K UHD is 7,680 × 4,320 pixels: 2 times the width and height of 4K UHD, and 4 times the pixel count. Even if you crop an 8K picture to half its width and half its height, you retain a 4K pixel count. This can be useful for changing the composition or leaving room around the edges for image stabilization.
Reading the diagram in English
- Blue outer frame — 8K UHD
- 7,680 × 4,320 pixels.
- Rust inner frame — 4K UHD crop
- 3,840 × 2,160 pixels: half the width and half the height of the 8K frame, so one quarter of its area.
- File size
- Pixel count alone does not determine storage size. The recording format and bitrate also matter.
Separate the recording frame rate from the playback frame rate
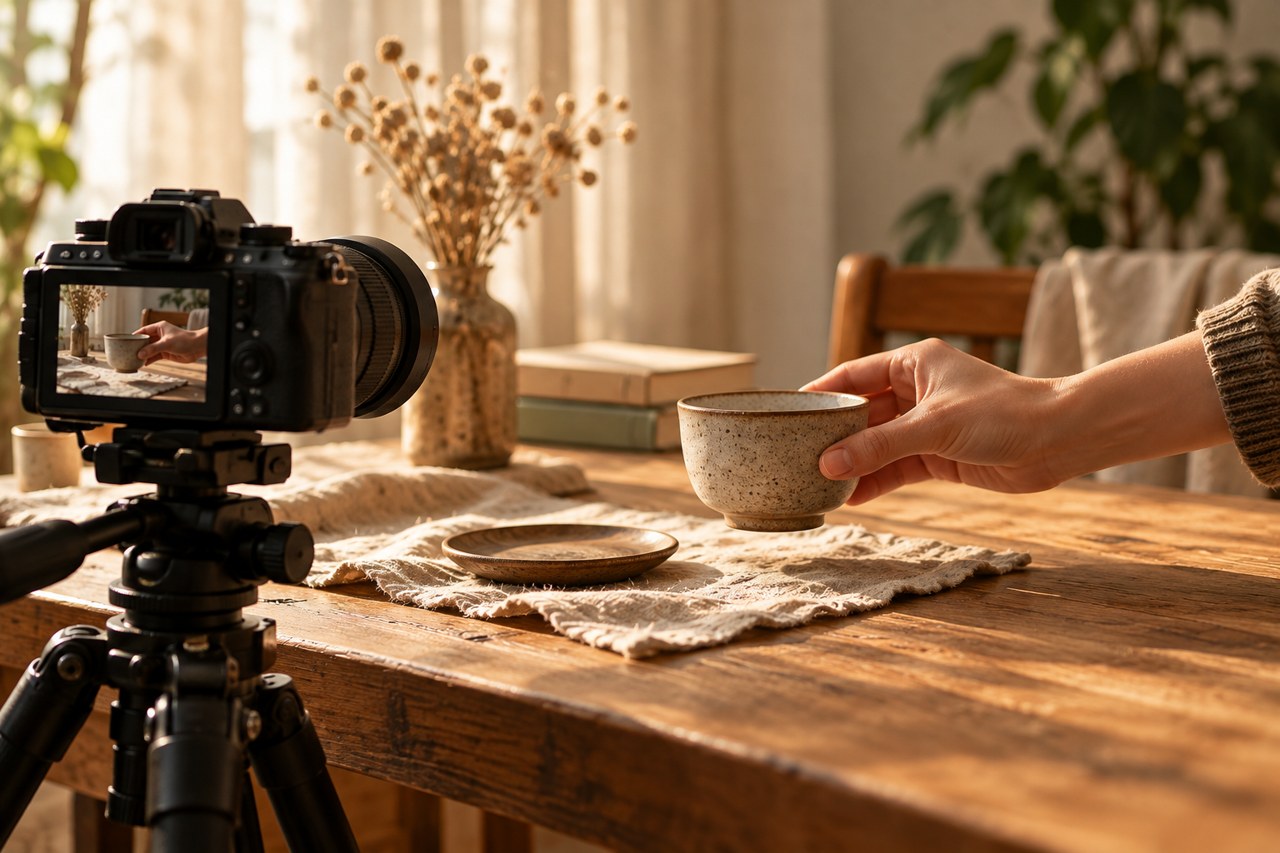
Recording for 1 second at 60fps captures 60 frames; at 120fps, it captures 120 frames. If you show all those frames in sequence at 30fps, 60 frames take 2 seconds and 120 frames take 4 seconds. This is the idea behind slow motion: showing the action more slowly than it was recorded.
This table scrolls horizontally. Swipe left or right, or focus the table and use the Left Arrow, Right Arrow, Home, and End keys to move through it.
| Recording fps | Playback fps | Playback duration of 1 second of recording | Speed of motion |
|---|---|---|---|
| 60fps | 60fps | 1 second | Normal speed |
| 60fps | 30fps | 2 seconds | 1/2 normal speed |
| 120fps | 30fps | 4 seconds | 1/4 normal speed |
Simply placing a clip in your editing software does not necessarily produce this slow motion. Specify the frame rate at which the software should interpret the footage, or set its playback speed, and check the final duration. Some cameras do not record audio in modes such as S&Q (Slow & Quick), which create slow-motion video in the camera. Check your camera's manual.
“30p” can mean 29.97fps
The p on the settings screen stands for progressive, a method that handles the whole picture of 1 frame in sequence. It is not a symbol for a fractional frame rate.
Some devices display a name rounded to the nearest whole number. The official guide for my α1, for Ver.2 and later, explains that 30p corresponds to 29.97fps, 60p to 59.94fps, and 120p to 119.88fps. Since 30p does not necessarily mean the same actual rate on every device, I check both the recording settings and the footage values shown by the editing software. The 60, 120, and 30 examples in this article are shorthand for understanding the timing relationship.
Drop-frame is a counting method that reduces drift from clock time
00:00:59;2800:00:59;2900:01:00;02The fractional part of 29.97fps dates back to the transition from black-and-white to color NTSC television, when the original 30fps was slowed by a factor of 1000/1001. The precise rate is approximately 29.97003fps.
Timecode identifies a position in a video using hours, minutes, seconds, and a frame number. If you keep counting 30 frames as 1 second with NDF (non-drop-frame), which skips no numbers, 1 displayed hour takes 3,603.6 seconds of real time: 1 hour and 3.6 seconds.
DF (drop-frame) reduces that drift to bring the count closer to clock time. At 29.97fps, DF skips the 2 numbers 00 and 01 at the beginning of each minute, except every 10th minute. For example, “00:00:59;29” is followed by “00:01:00;02”. The semicolon identifies DF notation. Only the numbers are skipped; no video frames are discarded. This is separate from changing the speed for slow motion or dropping frames during playback.
Finally, distinguish the recording fps from the fps of the submitted file. Adobe Stock's list of standard frame rates goes up to 60fps, and it accepts HD and UHD. Even when you record at a high fps, finish the file to meet the destination's submission requirements.
References
Adobe Stock / Video submission requirements (opens in a new tab)
Adobe Premiere / Interpreting footage frame rates (opens in a new tab)
Sony / α1 recording settings and actual frame rates (opens in a new tab)
Sony / Example of S&Q and audio recording (opens in a new tab)
Apple / Timecode and drop-frame explained (opens in a new tab)
SMPTE / EBU / Time Labelling and Synchronization Annex C (opens in a new tab)
4K UHD contains about 8.3 million pixels; 8K UHD about 33.2 million. At the same 4K resolution, 30 fps and 60 fps have the same pixel count per frame. If bitrate stays unchanged as frame rate rises, less data may be available per frame. Compare 8K and 4K through heat, battery use, editing, export, storage and upload time.
Stock Video Settings 2: Brightness, Flicker, and Storage
Once you have chosen the frame rate, check brightness and how much footage fits on the card. Turning up the numbers in the settings screen does not improve everything. Use short test recordings to spot differences such as a darker picture indoors, flickering lights, or a card that fills up quickly.
fps and shutter speed are separate settings
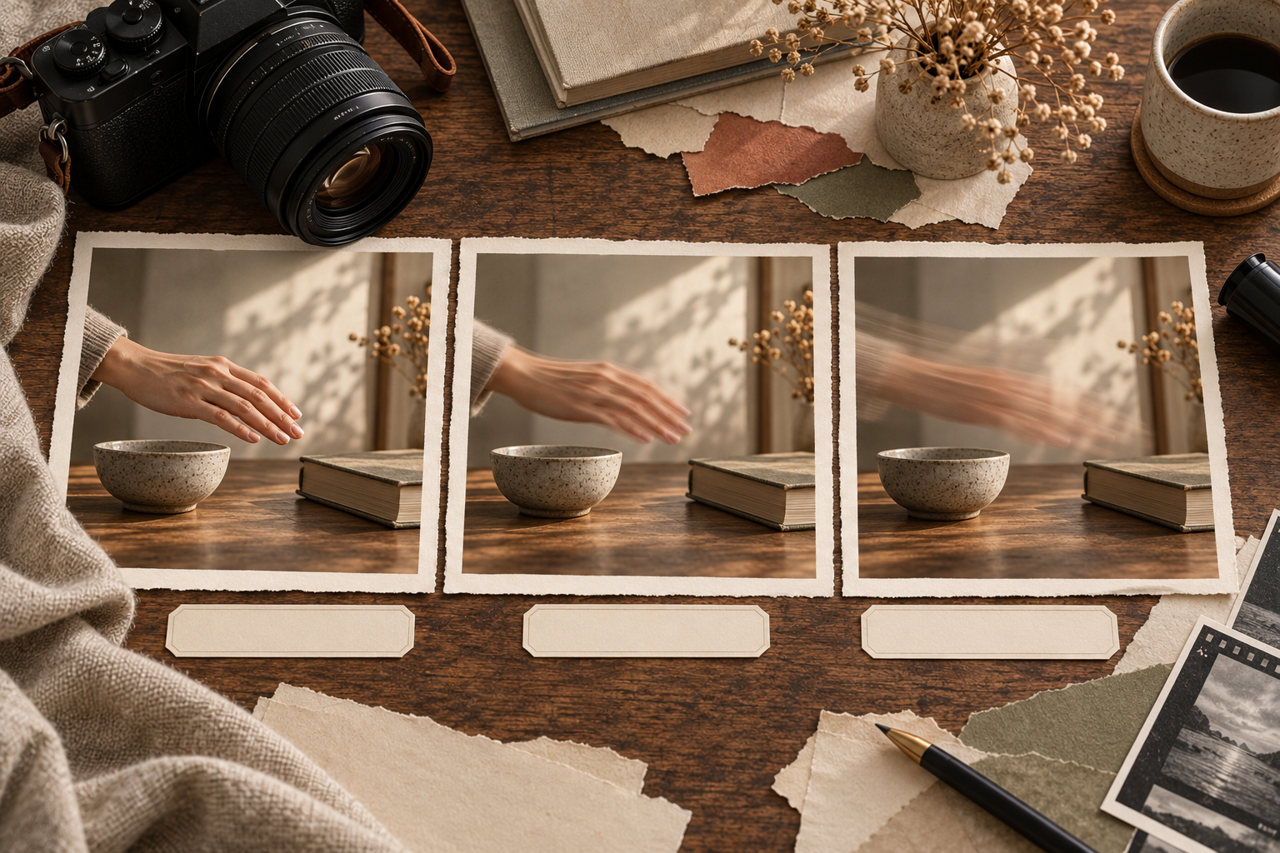
fps is the number of frames in 1 second. Shutter speed determines how long movement is captured in 1 frame. This period of taking in light is called exposure time. Think separately about the setting that determines the number of frames and the setting that determines how motion appears in each frame.
Change shutter speed according to how much motion blur you want to show. The movement you want to retain differs between filming tableware or a book with both camera and subject stationary and filming moving hands. These are starting points when recording at 30p.
This table scrolls horizontally. Swipe left or right, or focus the table and use the Left Arrow, Right Arrow, Home, and End keys to move through it.
| Subject or intended appearance | Starting shutter speed | What to check |
|---|---|---|
| Keep the camera, tableware, and book stationary | 1/60 second | Camera shake, brightness, and lighting flicker |
| Freeze a moving hand sharply | 1/250–1/500 second | Detail in the hand and how staccato the motion looks |
| Retain natural hand movement at 30p | 1/60 second | A little motion blur remaining in each frame |
| Leave a longer trail from the hand | 1/30 second | The amount of hand blur and whether the tableware and book appear stationary |
Using roughly 2 times the recording fps as the denominator gives approximately 1/60 second at 30fps, 1/120 second at 60fps, and 1/240 second at 120fps. The camera's normal choices may instead be 1/125 or 1/250 second, but these are approximations for the amount of motion blur. Treat 1/120 and 1/125 second separately when matching the flicker of lighting. The video specifications for my α1 give a manual shutter-speed range of 1/8000–1/4 second, but check the recording mode and fps for the values you can actually select.
Changing from 1/60 to 1/120 second halves the time spent taking in light. With the same lighting, aperture, and ISO sensitivity, the camera receives half as much light and the picture becomes darker. When shortening the time to 1/250–1/500 second to freeze a hand, also provide the brightness you need by adding light to the hands or moving somewhere brighter.
If it gets dark, adjust light, aperture, and ISO
Especially indoors, you may need to add lighting, move somewhere brighter, open the aperture, or increase ISO sensitivity. The aperture controls how much light passes through the lens. Opening it makes the picture brighter, but narrows the range that appears in focus.
Raising ISO sensitivity makes it easier to brighten the picture, but fine grain called noise may become noticeable. Rather than insisting on low ISO and blurring movement that needs to stay clear, adjust the lighting as well and check the recorded footage. Aperture and ISO are also explained in the related article “Consider Aperture, Shutter Speed, and ISO Together”.
Check flicker in the recorded footage
Fluorescent lights, LED lighting, and screens can cause the brightness in a video to change or horizontal bands to appear. This is called flicker. First record a short clip and play it back; do not judge only from the screen before recording.
My α1 has a function called Var. Shutter that allows fine adjustment of shutter speed in video too. The official guide for the original α1, for Ver.2 and later, requires a mode in which shutter speed can be adjusted manually. In contrast, Anti-flicker Shoot. is for still images and cannot be used for video. These are different functions despite their similar names. Your camera may not have the same functions, so check its manual and recording mode.
Start with the mains frequency of the region where you are filming
The local mains frequency is another clue when considering the flicker of lighting. In Japan, eastern Japan uses 50Hz and western Japan uses 60Hz. Looking at representative examples overseas also helps you choose shutter speeds to test when traveling.
This table scrolls horizontally. Swipe left or right, or focus the table and use the Left Arrow, Right Arrow, Home, and End keys to move through it.
| Mains frequency | Representative countries and regions | Starting points for test recordings |
|---|---|---|
| 50Hz | Eastern Japan, United Kingdom, France, Germany, Italy, Spain, China, India, Thailand, Singapore, Australia | 1/50 or 1/100 second |
| 60Hz | Western Japan, United States, Canada, Mexico, South Korea, Taiwan, Philippines, Brazil | 1/60 or 1/120 second |
Record a short clip using values suited to the region, then play it back to look for brightness changes and horizontal bands. When testing 1/120 second under 60Hz lighting, do not simply substitute 1/125 second even if that is a normal menu option. Check whether you can set 1/120 second using Var. Shutter or a similar function, and adjust based on the recorded footage. For light sources that flicker at a cycle different from the mains frequency, such as dimmed LEDs, test again while making fine adjustments with Var. Shutter. Check which shutter speeds are available at the recording fps, and combine this with changing the lighting or screen settings, light source, or location.
Sunlight is my favorite light to shoot in. For flicker that remains after recording, I also use tools such as the deflicker function in DaVinci Resolve Studio, checking the supported edition and the exported result.
Use recording settings to consider card capacity and recording time
Video recording settings may display numbers such as 100M and 600M. These indicate bitrate: a guide to the amount of data stored in 1 second. For example, 100Mbps means 100 megabits per 1 second. For the same recording duration, a higher bitrate uses more storage. Here I compare capacity to consider how many minutes fit on a card and whether there will be enough storage after getting home.
Data amounts use units called bits and bytes. 8bit equals 1byte. The lowercase b in Mbps means bits, while the uppercase B in MB means bytes, so 100Mbps is not 100MB per second. Dividing 100Mbps by 8 gives approximately 12.5MB per second.
The table below gives examples of storage calculations. 1,740Mbps is not an α1 recording-setting value. Bitrate alone does not determine resolution, as shown by the 4K and Full HD examples that both use 100Mbps. The approximately 170Mbps row is an example from the Canon EOS R7, not the α1.
This table scrolls horizontally. Swipe left or right, or focus the table and use the Left Arrow, Right Arrow, Home, and End keys to move through it.
| Bitrate | Actual manufacturer-published setting, or value used only for calculation | Data per 1 second | Recording for 1 minute | Recording for 1 hour |
|---|---|---|---|---|
| 100Mbps | Sony α1: 4K UHD 29.97p, XAVC S / H.264, Long GOP, 4:2:0 8bit. Or Full HD 119.88p, XAVC S HD, Long GOP, 4:2:0 8bit | Approx. 12.5MB | Approx. 0.75GB | Approx. 45GB |
| Approx. 170Mbps | Canon EOS R7: 4K UHD 29.97p, Canon Log 3 on, H.265, IPB (Standard), 4:2:2 10bit | Approx. 21.25MB | Approx. 1.275GB | Approx. 76.5GB |
| 600Mbps | Sony α1:4K UHD 59.94p、XAVC S-I/H.264、Intra、4:2:2 10bit | Approx. 75MB | Approx. 4.5GB | Approx. 270GB |
| 1,740Mbps | Example for calculating storage only. Not an α1 recording setting | Approx. 217.5MB | Approx. 13.05GB | Approx. 783GB |
The table's storage figures are estimates obtained by dividing bitrate by 8 to convert it to bytes, then multiplying by the number of recording seconds. Canon publishes a file size of approximately 1,218MB per minute for the EOS R7's approximately 170Mbps setting. Treat that separately from the approximately 1,275MB per minute calculated here using a constant 170Mbps.
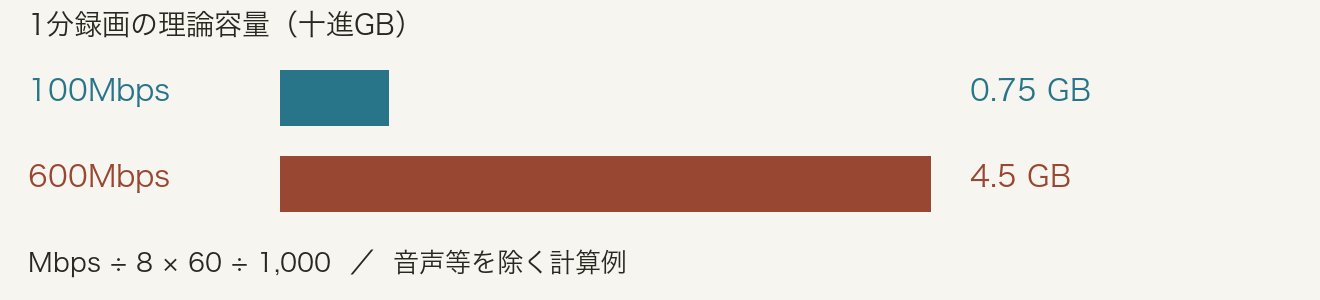
Reading the diagram in English
- Theoretical size of a one-minute recording
- The chart uses decimal GB and assumes a constant bitrate.
- Blue bar — 100 Mbps
- 0.75 GB for one minute.
- Rust bar — 600 Mbps
- 4.5 GB for one minute.
- Calculation
- Mbps ÷ 8 × 60 ÷ 1,000 = decimal GB per minute. This example excludes audio and other overhead.
Actual amounts may differ from the table because VBR (variable bitrate) changes the data rate according to the picture content, and audio and other data also take space. Check the remaining recording time shown by the camera too. Even a high-capacity card may not record if its write speed is insufficient. Check the manufacturer's card requirements for your recording settings.
Editing files and backups also use storage. 1TB of original data plus 2 copies takes 3TB in total. A small file can also be demanding to edit on a computer if decoding it is complex. Check not only whether it fits on the card, but whether you can get all the way through to export on your own computer.
References
Consider Aperture, Shutter Speed, and ISO Together (Field Notes)
Sony / α1 Anti-flicker Shoot. and Var. Shutter (opens in a new tab)
Sony / α1 video recording settings and bitrate (opens in a new tab)
Blackmagic Design / Resolve FX in DaVinci Resolve Studio (opens in a new tab)
Sony / α1 compression formats and computer compatibility (opens in a new tab)
Sony / Getting started with α video: camera settings (opens in a new tab)
Sony / α1 specifications (opens in a new tab)
Sony / α1 video settings (original guide) (opens in a new tab)
Canon / EOS R7 specifications (opens in a new tab)
Canon / EOS R7 Canon Log settings (opens in a new tab)
TEPCO / Substations (opens in a new tab)
Bel/World Plug and Input Voltage Guide (opens in a new tab)
For a direct calculation in decimal GB, one minute is Mbps × 7.5 ÷ 1,000 and one hour is Mbps × 450 ÷ 1,000. A higher bitrate alone does not establish higher image quality; compression and shooting conditions matter too.
Stock Video Settings 3: Color and Recording Formats
Settings 1 covered picture detail and frame rate; Settings 2 covered brightness and storage. Next is how the colors and brightness you capture are stored as data. 4:2:2, 10bit, Log, and RAW are different items, so I will consider them one by one instead of grouping them together as “high-quality settings”.
Read 4:2:2 as “four-two-two”
Video may be recorded with brightness information separated from information describing color differences. The brightness information is called luma, and the color-difference information is called chroma. Read 4:2:2 as “four-two-two” and 4:2:0 as “four-two-zero”. These numbers indicate how much chroma detail is retained relative to luma.
In basic terms, 4:2:2 halves the horizontal chroma resolution without reducing it vertically. 4:2:0 halves it both horizontally and vertically. In the diagram's area of 4 pixels across × 2 pixels high, luma has 8 samples; each chroma component has 4 samples in 4:2:2 and 2 samples in 4:2:0. A sample is a unit in which information is recorded.
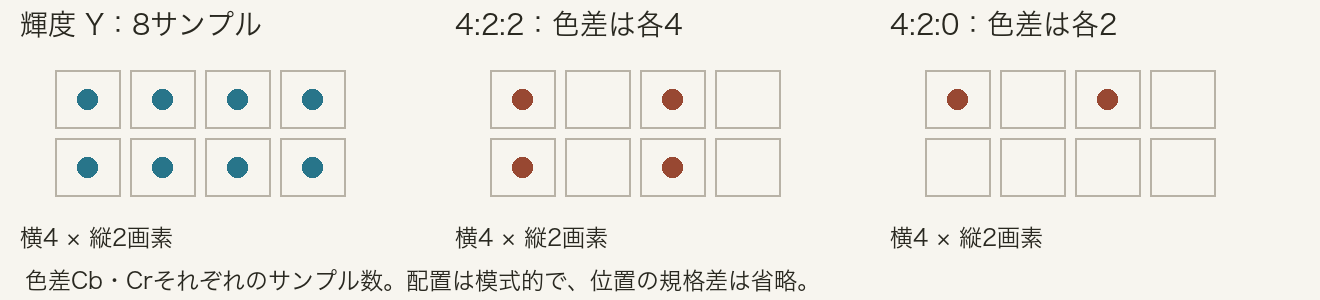
Reading the diagram in English
- Each grid
- A block of 4 pixels across × 2 pixels high.
- Left — luminance Y
- 8 samples of brightness information.
- Middle — 4:2:2
- 4 samples for Cb and 4 samples for Cr, the two color-difference components.
- Right — 4:2:0
- 2 samples for Cb and 2 samples for Cr.
- Sample positions
- The layout is schematic. Differences in sample positioning between standards are omitted.
Retaining more chroma detail can help with compositing that removes a background color or with fine color adjustments. Choosing 4:2:2 alone does not improve focus or brightness, though. Consider both the editing you need and whether your own computer can handle it.
8bit and 10bit describe the fineness of the levels
bit is the unit introduced in Settings 2. Here it relates to how many numerical levels represent one component of brightness or color. 8bit offers 256 values; 10bit offers 1,024, so 10bit allows finer levels to be recorded. This affects how much room there is to adjust brightness and color later, but does not mean that 10bit makes every adjustment possible.
This table scrolls horizontally. Swipe left or right, or focus the table and use the Left Arrow, Right Arrow, Home, and End keys to move through it.
| Setting | What it describes | What to check |
|---|---|---|
| 4:2:2/4:2:0 | How much chroma detail is retained | Whether it is needed for compositing or color adjustment |
| 8bit/10bit | The numerical levels representing one component | Adjustment room and computer compatibility |
Converting 8bit to 10bit or 4:2:0 to 4:2:2 later cannot fully recover information that was not recorded during shooting. Think about the editing the finished video will need before you shoot.
For RAW, check the whole finishing environment
A camera processes information received by its sensor to create video. RAW video is a recording format for working with that sensor-derived information during finishing. However, RAW does not necessarily mean uncompressed or completely unprocessed: the information stored and the processing involved differ by format.
For the original α1 that I own, the official guide for Ver.2 and later says RAW video cannot be recorded to the camera's internal memory card, but RAW can be output over HDMI to compatible external equipment. HDMI is a connection for sending video and other signals to external equipment. This does not mean that the α1 cannot handle RAW video. Check internal card recording and external output separately for your own model.
If you use RAW, test whether compatible software can take you through importing, adjustment, export, and storage. You do not need to treat RAW as a requirement from the outset.
Separate the roles of Log and LUTs too
Log is a method for recording a range of brightness, rather than the name of a shared compression format. Straight out of the camera, it can look lower in contrast and less saturated than ordinary footage. Finishing requires color transforms and adjustments suited to the Log used for recording.
Exposure, meaning how you set the brightness of the picture, differs by camera and type of Log. I do not use a blanket rule of shooting every Log brighter.
A LUT, pronounced “lut”, is a lookup table that maps color and brightness values to other values. It may be used only to make the monitoring image easier to view while shooting, or it may be applied to the recorded footage. Check which your camera does. Including automatic transforms in editing software, take care not to apply the same technical transform twice.
Start by finishing a short video and checking color, noise, playback, and export time. Log and RAW are options to add when you need the workflow they involve.
References
Microsoft / Chroma subsampling (opens in a new tab)
Sony / α1 color information and bit depth (opens in a new tab)
Sony / α1 internal video formats (opens in a new tab)
Sony / α1 HDMI RAW output and card-recording limitations (opens in a new tab)
Sony / Log shooting guide (opens in a new tab)
Official documentation / Blackmagic RAW format and processing (opens in a new tab)
Sony / Example of a monitoring LUT (opens in a new tab)
Sony / Example of a setting that applies a LUT to the recording (opens in a new tab)
Smooth gradients in skies or walls may show banding, including when strongly adjusting 8-bit Log footage. One practical trial is to record about a minute with the actual settings and compare the finished files. A minute is a test example. A display or delivery file may not reproduce all the information recorded at capture.
For Log, use the exposure tools available on the equipment, such as a waveform showing brightness distribution, zebras marking areas near clipping, or a histogram, and record the Log curve and color gamut. A LUT cannot restore clipped highlights, lost shadow detail or missed focus. A creative LUT may not provide the correct technical conversion. Open the export outside the editor as well.
Developing RAW involves deciding brightness, color, contrast, noise and detail, then exporting a finished video that can be played normally. After saving, close the software and reopen the same material and settings, and export it through to completion. Keep the camera settings, recording format, software version and color settings with the result. Consider future software compatibility when deciding which source files, settings and finished videos to retain.
RAW cannot recover unrecorded highlight detail, missed focus, unwanted motion blur or a moment not captured. Finish the same scene in RAW and a compressed format, then compare time and cost. A storage arrangement with the source plus two copies requires three times the source capacity.
How I Shoot Stock Video: Reducing Work During Shooting and Finishing
Settings 1–3 explained the basic mechanisms. From here, I describe the choices I make when shooting video for stock. Read this as my experience of reducing the work involved in shooting and editing, rather than applying identical settings to every camera.
Decide brightness and shutter speed first
My priorities are avoiding too slow a shutter speed and getting the brightness of the picture right. I want to keep the work needed during editing as small as possible.
When shooting at 120fps, I use 1/240 second as a guide. Here, “avoiding too slow” means not extending the exposure time so far that motion blur increases. I generally use a gimbal, equipment that reduces camera shake, so shake is not a major issue either. However, I always stop recording when there is a large jolt or when moving a long way to another view.
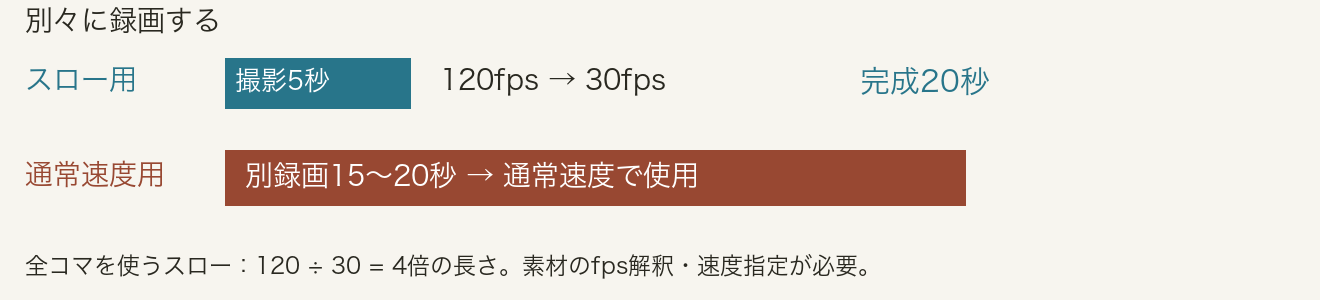
Reading the diagram in English
- Record two separate takes
- The blue and rust rows represent different recordings.
- Blue row — slow motion
- Record 5 seconds at 120 fps, then play all frames at 30 fps to produce 20 seconds. 120 ÷ 30 = four times the recorded duration.
- Rust row — normal speed
- Record a separate 15–20-second take and use it at normal speed.
- Editing step
- The slow-motion result requires the appropriate footage interpretation or speed setting.
Record slow-motion and normal-speed footage separately
Playing all the frames recorded at 120fps at 30fps makes the duration 4 times as long. A 5-second recording becomes a 20-second slow-motion video.
I record around 5 seconds for slow motion and around 15 seconds for normal speed. Sometimes I record for around 20–25 seconds when I want both together, but that adds work separating them later. I am considering separating the recordings: 5 seconds for slow motion first, then 15–20 seconds for normal speed.
This table scrolls horizontally. Swipe left or right, or focus the table and use the Left Arrow, Right Arrow, Home, and End keys to move through it.
| Use | Recording guideline | Approach to finishing |
|---|---|---|
| For slow motion | Approx. 5 seconds | Approx. 20 seconds from 120fps to 30fps |
| For normal speed | Approx. 15–20 seconds | Use approx. 15–20 seconds at normal speed |
I generally record videos shorter than 1 minute, but keep the submitted clips to 30 seconds or less. This is based on my understanding that having the same scene last 30 seconds or more can be a reason for rejection at iStock. I keep within that duration both for unchanged content and for videos in which the movement changes.
This is my submission policy based on iStock rejection reasons. It is not a universal limit for all submission destinations, nor does it mean a clip of 30 seconds or less will always pass review.
Remaining flicker adds editing work
I remove flicker that remains after shooting with DaVinci Resolve's deflicker function. However, I feel that adding this processing puts a heavy load on the computer during export. Reducing the work later is also why I pay attention to brightness and shutter speed while shooting.
This is my experience. It does not mean every kind of flicker can always be fixed. In your own setup, check the conditions for using the function and whether the processed footage has any unnatural movement.
Do not pursue settings beyond what you need just because they are available
I choose 4:2:2 largely because it is available. I do not worry excessively about 4:2:0 either. On my α1, I shoot in an internally recorded compressed video format rather than RAW video. Compression is processing that reduces the amount of stored data. I do not find it inconvenient, and I feel it also has a storage advantage. Even in an environment that supports RAW, I would choose non-RAW if I did not need RAW.
Internal RAW video recording and HDMI RAW output on the α1 are separate matters. I am describing the way I shoot, not saying that the camera as a whole lacks RAW video support.
I used to shoot for a destination that accepted 8K, then convert to 4K for another destination. Even with 5 HDDs (hard disk drives) and 3 SSDs for storage, I did not have much spare capacity, and the sales I could confirm did not justify continuing with 8K as my standard. I now consider 4K sufficient, and I do not rule out starting in HD.
I submit rather than deciding whether something will sell
I do not focus on whether a clip will be rejected; I basically keep submitting. As a result, I have no specific experience I can cite here of being rejected for image quality or format. That does not mean I have never been rejected.
I do not decide whether something will sell for every shoot either. My approach is to submit almost everything that can be offered as stock. I want to keep building a collection of usable material rather than stopping shooting based solely on individual results.
References
Adobe Stock / Video submission requirements (opens in a new tab)
Adobe Premiere / Interpreting fps and duration (opens in a new tab)
Sony / α1 HDMI RAW output and card-recording limitations (opens in a new tab)
Blackmagic Design / Resolve FX in DaVinci Resolve Studio (opens in a new tab)
Video settings checklist
- Review section: Start with a short 4K recording and test importing through to export in the delivery format. ↗
- Review section: Distinguish the setting label from the actual frame rate, and decide recording and playback speeds. ↗
- Review section: Check the combination of lighting, frame rate and shutter speed in recorded footage. ↗
- Review section: Estimate recording size from bitrate and allow storage for copies too. ↗
- Review section: Choose color and recording formats for the adjustments you need and the editing system you have. ↗
- Review section: Record separate slow-motion and normal-speed takes, and review them at the intended finished speed. ↗
Use the checks as a working note while this page is open.